
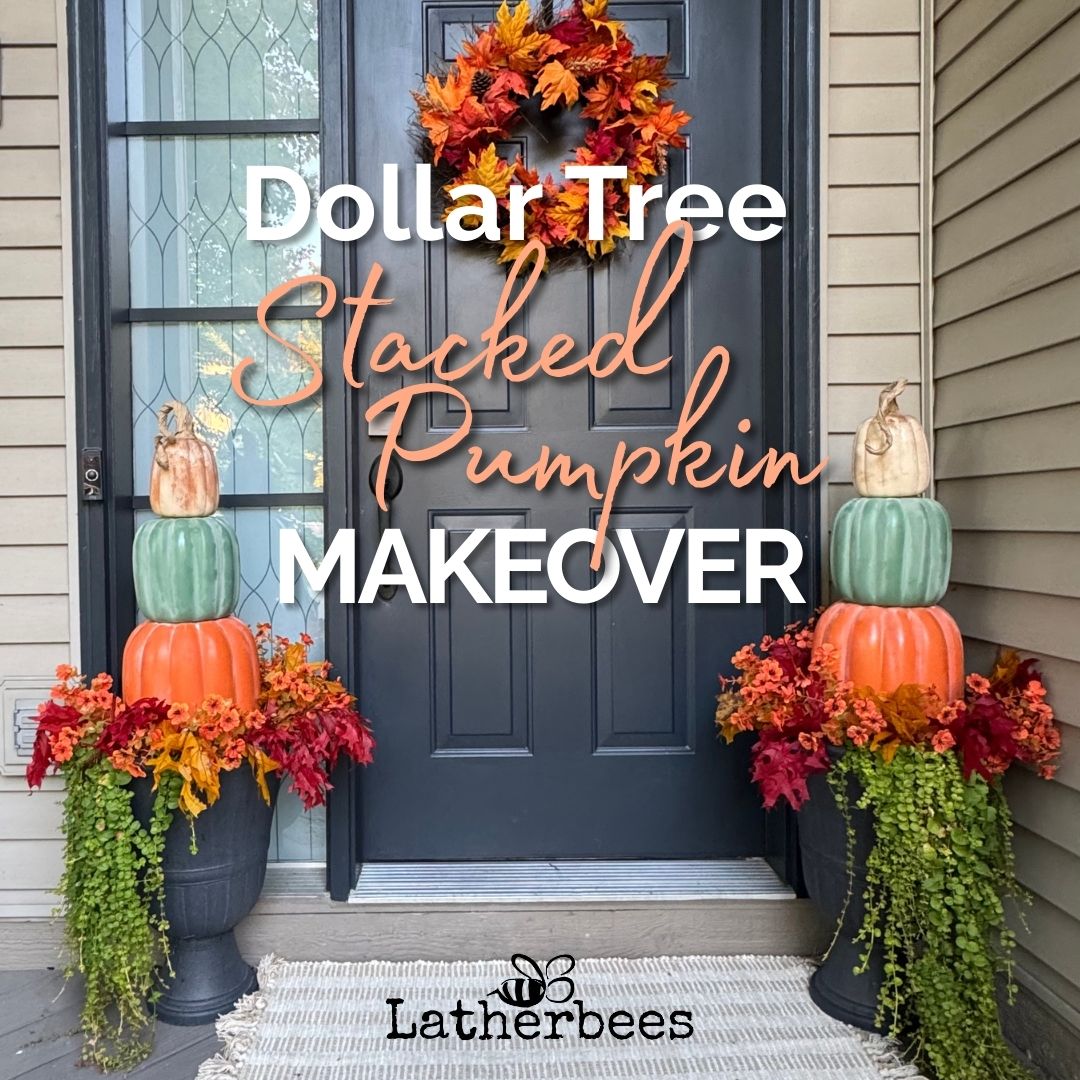
If you’ve seen those Dollar Tree stacked pumpkins going viral, you know how fun they are—but they can look a little… well, Dollar Tree. Don’t worry! In this step-by-step tutorial, I’ll show you exactly how to give these Dollar Tree stacked pumpkins a makeover. With just a little paint, baking soda, and creativity, you can turn them from bland to fabulous.
Inspired by the Blue Doll Pumpkins, Lumina Pumpkins, and classic orange Cinderella Pumpkins, this DIY makeover gives you the same chic stacked look—on a budget.

Table of contents
Watch the Video on YouTube
Stacked Pumpkin Supplies
- Stacked Pumpkins (or separate plastic pumpkins to stack)
- Spray paint
- Optional- Polyacrylic Sealer (if using outside)
- Baking soda (adds texture)
- Cinnamon (optional, for extra warmth on white pumpkins)
- Craft paper
- Craft glue or Mod Podge
- Hot glue gun & glue sticks
- Fall Leaves, Fall Flowers, Spanish Moss
- Urn Planters
Step 1: Spray Paint the Pumpkins
Start by giving each pumpkin a solid coat of spray paint. I put two thin coats of spray paint.


Step 2: Apply More Spray Paint
Once the first couple of coats are dry, lightly spray another THIN coat—focusing on the pumpkin’s crevices. This final coat of spray paint functions as the ‘glue’.

Step 3: Sprinkle on Baking Soda or Cinnamon
While the paint is still tacky, sprinkle baking soda over the pumpkins, focusing on the crevices. This creates a natural, chalky texture that looks just like real heirloom pumpkins.

For white pumpkins, try adding a dusting of cinnamon—it gives them extra depth and a warm, farmhouse feel.

Step 4: DIY a Pumpkin Stem
While the pumpkins dry, tear off a piece of craft paper and crinkle it up tightly.

Lay craft paper flat, then coat one side with craft glue or Mod Podge. Roll the paper loosely, then twist it until it resembles a vine.


Step 5: Attach the Stem
Once dry, hot glue your DIY stem to the top pumpkin. This instantly makes it look more realistic.


Step 6: Seal Pumpkins
This is optional- If you are storing your pumpkins outside, factors like humidity and weather might come into play. I would recommend coating them with a polyacrylic sealer to hold in the baking soda and cinnamon. If they are being used inside, I wouldn’t worry about sealing them.
Step 7: Stack and Style
Now comes the fun part—stack your pumpkins! Play with the arrangement until you get the perfect look. I removed the pink impatiens from my planters and left the creeping jenny.

I added some orange flower stems and dried bunches of fall leaves. Since the planters already had dirt, I simply stuck the stems in to hold them in place.

I love the way they turned out!

Decorating Ideas
I love how these pumpkins look on my porch, and I’m already planning to make a few more for my fireplace. The best part? This entire project cost less than $30, yet it gave me a stunning, designer-inspired fall display that looks expensive but is totally budget-friendly.

This Dollar Tree pumpkin stack makeover is proof that budget-friendly decor can look gorgeous. With a little creativity, you can take simple stacked pumpkins and transform them into high-end fall decor that looks like it came from a boutique.
If you enjoy easy DIYs like this, you’ll also love my step-by-step tutorial on how to make homemade soap, or how you can make soap from a Pingles can both fun (and affordable!) projects you can try at home.
Would you try this DIY makeover? Let me know in the comments—I’d love to hear how you styled your pumpkins!
Want to remember this post? Save it to your favorite board on Pinterest here.




Leave a Reply